
 Premium Training & Support
 Diffuser for Mitutoyo M Plan APO Objectives
 Turtledove Diffusers: Canon MT-24 EX Twin Lite Flash
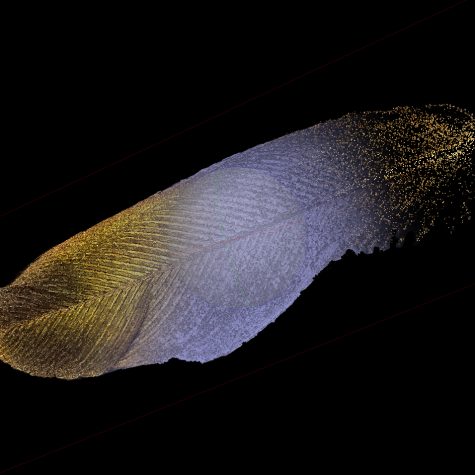 Ruby-throated Hummingbird Tail Feather: 3D Model
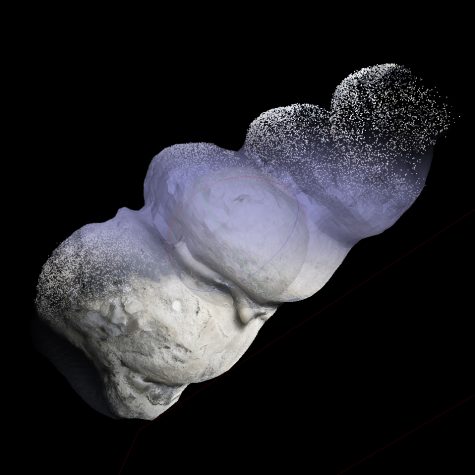 Internal Mold of a Turretellid Gastropod: Fossil
 Hatching Stick Insect
 Rotary Stage for Manual Micro/Macro 3D Imaging
 Macropod PRO 3D & Micro Kit R5 Educational
 Diffuser for Canon M-PE 65mm 1-5x
 Mitutoyo to 77mm Adapter
 Corylus americana, Leaf Texture from Fenton River
Forum Replies Created
-
AuthorPosts
-
Macroscopic SolutionsKeymaster
I see that you have already responded. I’m glad you found a solution. Glad you are all settled!
Macroscopic SolutionsKeymasterHi Taylor, definitely not. There is something else going on that is causing the problem. I’d first recommend a factory reset of the stackshot and a firmware update, which may be found here: https://macroscopicsolutions.com/update-the-stackshot-3x-by-cognisys/
Outside of this, I need clarity on which program you are running to link axes. Are you using auto-distance, auto-step or other? Screenshots of the stackshot screen will also be helpful.
All this said, it sounds like the specimen itself might be moving considering that it’s only happening half way through. Is it possible the specimen stage is running into the camera lens, diffuser or gimbal?
Is the universal stage, pinned specimen fully secure on the rotary stage? If it’s moving, this could be contributing to your issue.
Macroscopic SolutionsKeymasterThe intermittent black frame is caused by a lack of power to the flash and there are a number of solutions.
1) Never use a power greater than 1/4. You’ll need to confirm the flash is NOT in ETTL mode, which uses far more battery capacity than manual mode. You’ll want to change the flash power according to the table on in the manual. Never use the power at 1/1 – 1/4. Only use it at 1/4 – 1/128. If you find your images are too dark, simply increase the ISO a little. Flash A and B should not be at different powers, is there a particular reason why you are doing this?
2) Batteries: This is most likely a result of the rechargeable batteries beginning to lose initial capacity. Although rechargeable, over time they lose the ability to hold a charge for longer. I add labels to all my AA rechargeable with the date I started using them. This helps me keep track of batteries that are older and; therefore, need replacing. You would need to slow down image capture time if you think the batteries are not the problem.
3) Another solution is to slow the rate of capture with the controller. This gives the recharge on the flash more time. You an do this by going to setting on the Stackshot, clicking settings > “axis settings” > clicking the axis you’re using (likely x) > and change the settle time and stack speed.
4) I can’t remember if Michael ordered the external battery pack from me or not (CP-E4N), but I was under the impression he had. There were some Canon components he removed from the package to save cost. Somewhere in the pack might be an 8 AA external battery pack that is meant to be used with the flash. Can you confirm you have this?
Flash: If you are indeed using the Quantum external AC adapter; then the problem is undoubtedly the batteries. If your flash is not firing when using the Quantum, then your batteries must not be sustaining the charge. It’s also likely the Quantum AC adapter is what damaged the batteries. I’ve heard reports of this melting the flash heads due to overheating. A much better and more controlled way to extend the life of your flash is to use the external pack made for it. A 3 second settle time is more than sufficient so it’s unclear to me what the problem is. I saw on your forum post that you are changing the output power of each flash head. May I ask why you are doing this? This should have no influence when diffusing light, it only makes a difference if your light is coming form a preferred angle to help with contrast. However, if using the Micro Kit and diffuser, it’s simply not needed.
To better address the flash problem, it would be good to know details like 1) How many pictures are you taking in the stack? 2) Confirm 3 second settle time 3) ISO, Exposure time, Aperture, and Flash power. Of the possibilities I sent you, what do you think is most likely? Batteries?
About Zerene Stacker, it sounds like you are not following the method that I recommend. For instance, the the system is better controlled using EOS Utility and NOT Zerene Stacker. There is a 3rd party hardware controller called CamRanger that more seamlessly combines Zerene Stacker with the StackShot Controller; however, I do not recommend. It’s an unnecessary complexity. The USB cable is intended to tether the Camera Body to EOS remote utility.
There is not a way to split a complete stack into sub stacks in Zerene Stacker; however, there is a way to do it on your computer. This method is described in video 1.2.3 here: http://macroscopicsolutions.com/tutorials/
“Buggy Stackshot” Again, this is not the recommended method; however, it sounds like the software is putting your stackshot into High Precision Mode. This is not a bug, it’s a feature allowing you more stable shooting under microscopic conditions. The servo emits a frequency that keeps pressure against the threads to ensure the sample does not shift between stacks. However, this is something I do not recommend using because Zerene Stacker is very good at aligning frames that may have shifted so long as you have sufficient stacks. My guess is, you have turned on High Precision mode in the software and did not turn it off. You can turn this off through Zerene Stacker or by entering settings on the controller.
If you have not done so, I would review the videos in the tutorial section in order and follow along. http://macroscopicsolutions.com/tutorials/ If you have already done this and decided to use alternative methods, its going to be difficult to help simply because we have performed a number of methods and tests to find the most effective/efficient method for image capture. This is the one we recommend for reasons pertaining to workflow, camera/flash longevity and overall quality.
- This reply was modified 7 years ago by Macroscopic Solutions.
Macroscopic SolutionsKeymasterJim, this issue can be related to one of three primary issues.
1) Ultrasonic Motors in Lens – You will want to confirm the ultrasonic image stabilizers are in the off position when shooting with microscope objectives attached. The reason is because the stabilizer is designed to trigger when the camera is being exposed to light. Ever time this happens, there is an internal mechanism that braces internal optics. The result is a stable lens when a photo is being captured which generates an overall sharper image less prone to lens blur. This does not work when stacking because the mechanism stabilizing the glass will always be in a slightly different position between frames and over a period of time. In the case of stacking, you do not want anything touching or altering the lease between shots and because the system is supported by a rugged tripod, the need for stabilization is not necessary or recommended.
2) Not enough pictures – Serene Stacker is phenomenally good at aligning features in images, even if the there is a slight wiggle between frames. Therefore, the simple solution is to capture a greater number of images. Allow for 50-75% of overlap. For example, at 50x, i generally take between 200-300 images to complete a stack. The patience it requires is far more efficient than a do-over.
3) High Precision Mode – there isa mode in the stackshot controller called “High Precision Mode.” This will help fix this issue without having to allow for greater overlap. The difference is that in normal mode the rail position is accurate to roughly 0.005 mm uncertainty, while in high precision mode the accuracy is increased to roughly 0.001 mm uncertainty. Obviously high precision mode is better for fine work, such as through a high power microscope objective where the nominal step size may be only 0.010 mm or less. However, high precision mode has the drawbacks that 1) it causes the stepper motor to produce a nearly continuous high-pitched whining sound that can be annoying to people around it, and 2) the motor drive currents are larger so the motor will become warm. Often a good strategy is to set the high precision threshold to something like 0.020 mm so that large steps are done in normal mode and the rail stays cool and quiet except when it is actually moving, while small steps are done in high precision mode where the increased accuracy is required.
-
AuthorPosts